As the lead developer of the project, my job was to construct the webapp and some of its functionality through React.Js whilst following the instruction of the design team. I would made use of Firebase to deal with back end setup of the project, as well as hosting. However the project did go through two softwares before we came to the decision to use React.

Vs Code was used for the React.js side of the project, enabled me and the other dev to work on the code at the same time via the sharing plugim

I used Sublime to code the WordPress area of this project, as I was coding vanilla PHP.
1. A Working Web Application that enables students an area to place items of note, to chat and to share ideas
2. A functioning sign in system, enabling students to sign up or sign in with their email.
3. The ability to upload custom posts, using local files on the users device.
4. A functioning feed showing off recent posts to the user
I made use of weeks 1-6 to learn and plan about what we needed to create and how we were going to create it. Below is a drafted plan of mine in which shows my intentions for the project, as well as software, programs and resources that I will look into using for the project.
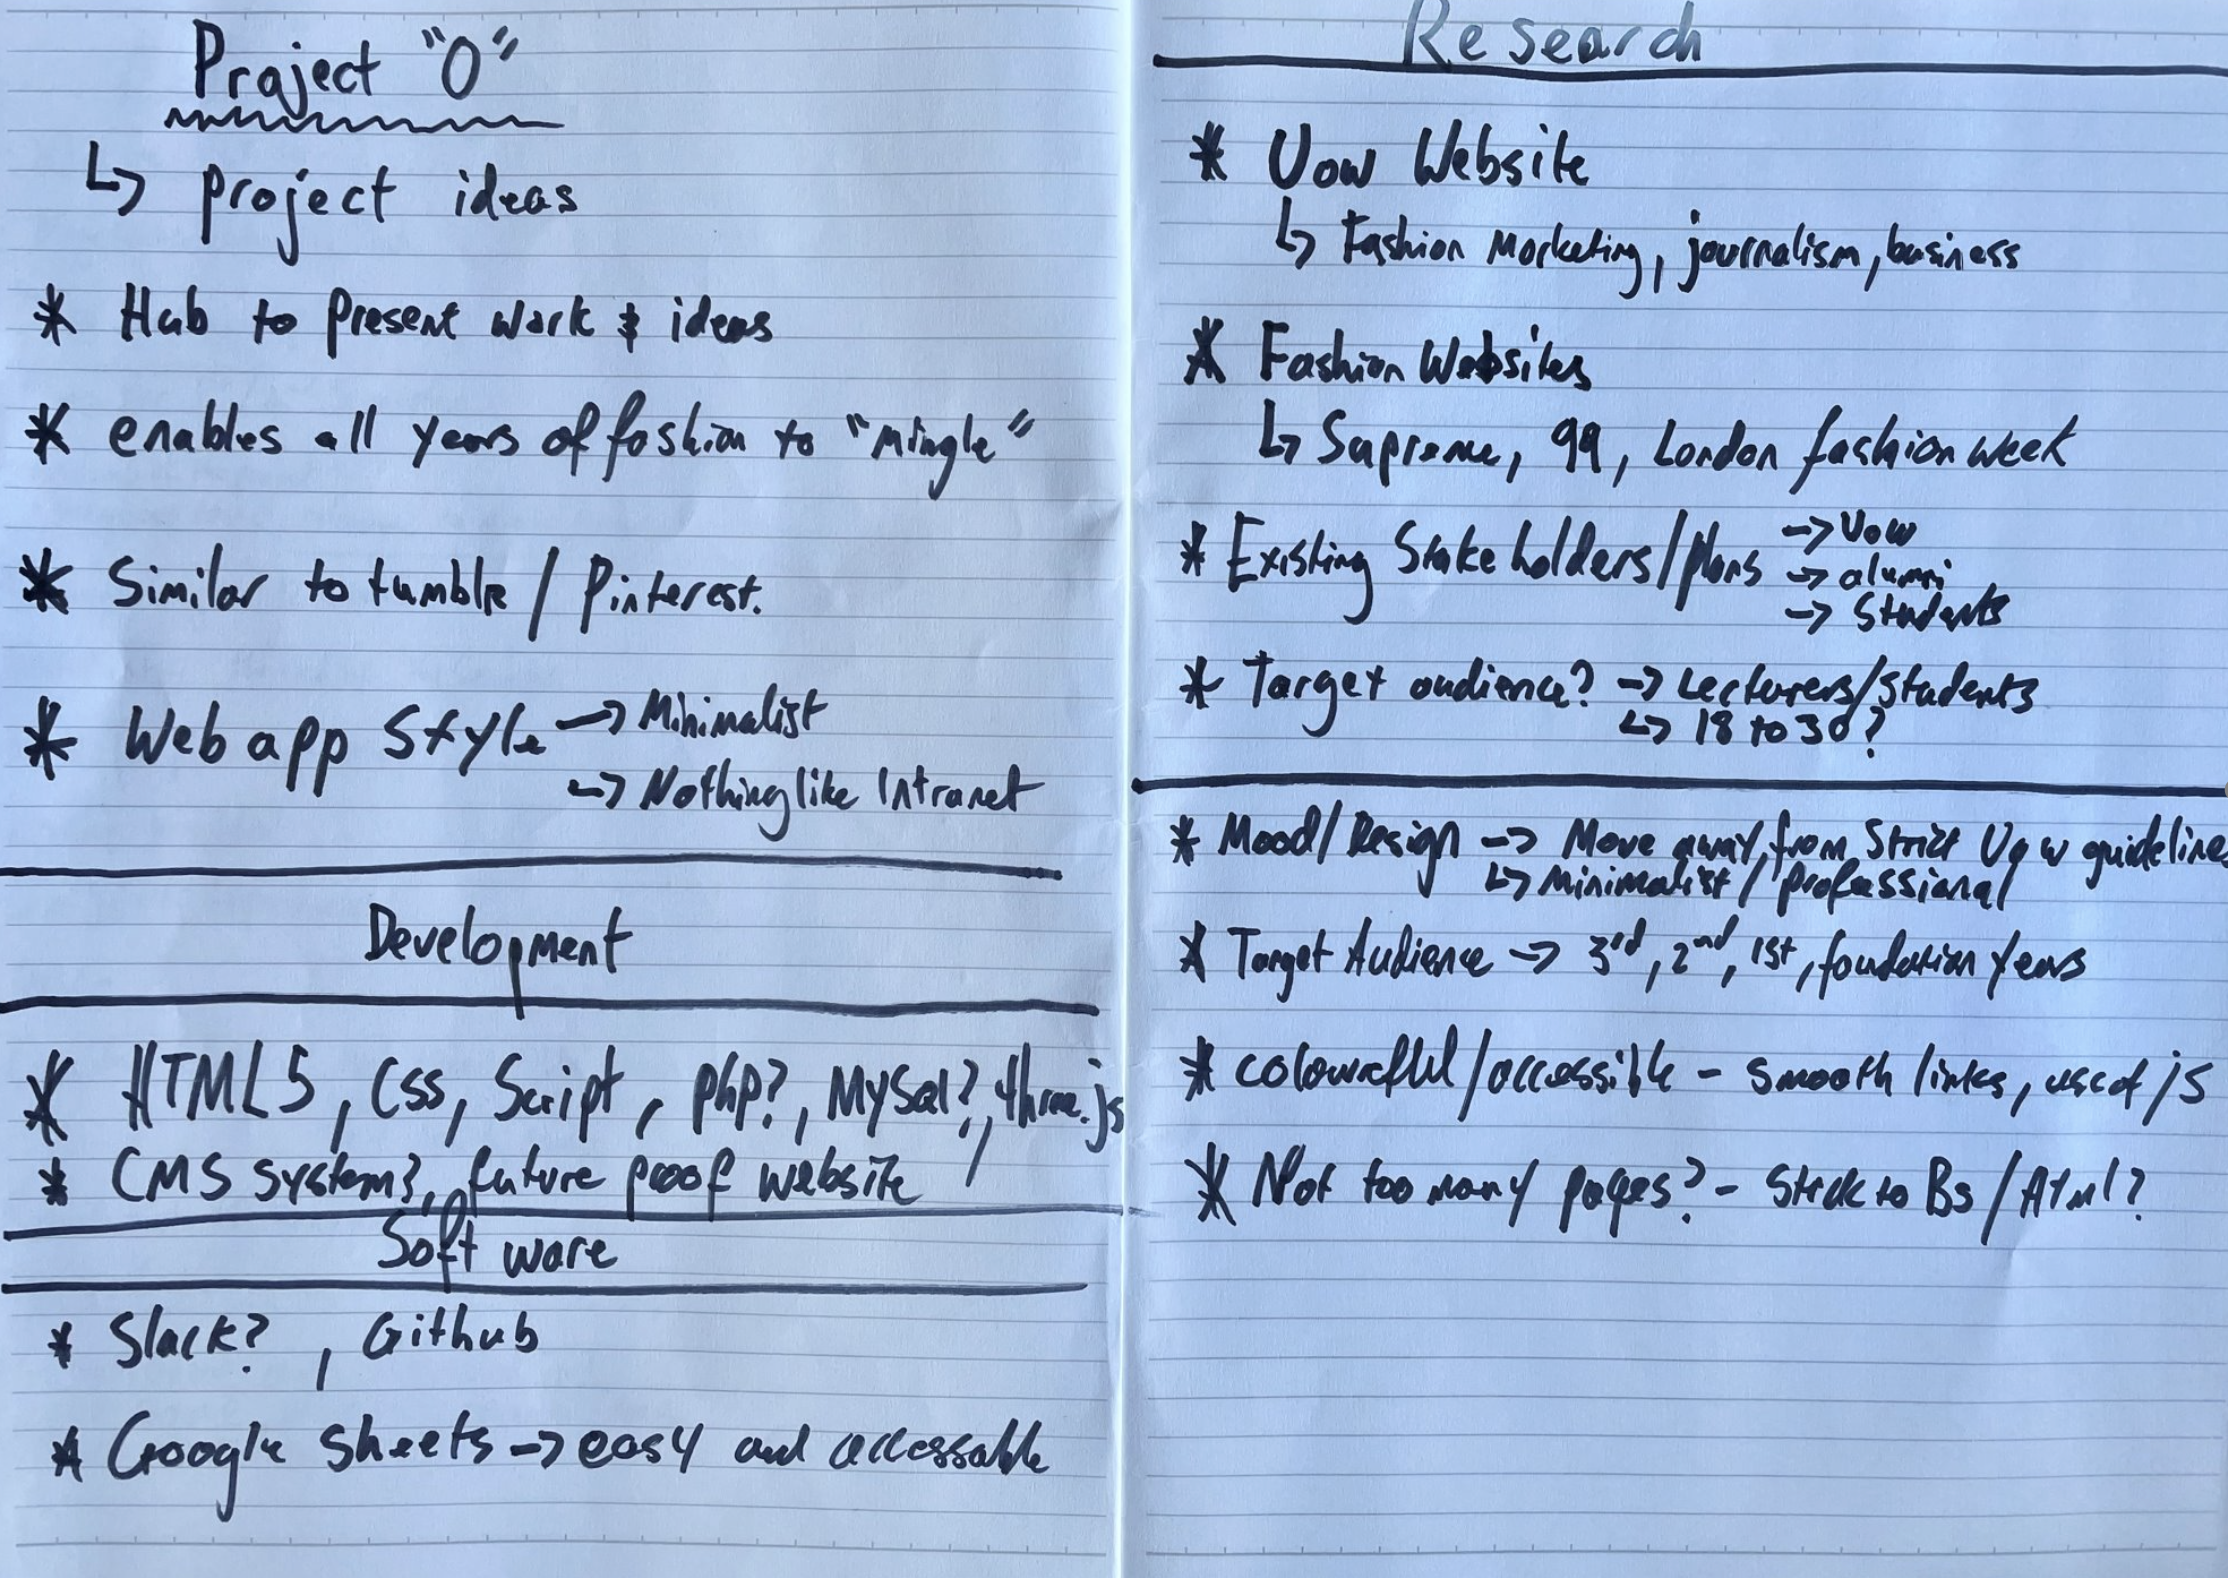
These writings show my beginning ideas for the Project.
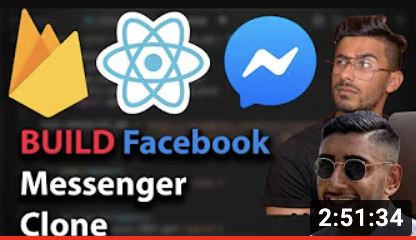

To get a good understanding of what makes a good socail media application, I looked into different ways in which I could make the webapp possible. Above are a few examples of youtube videos and different softwares in which I looked into in order to prepare to create the app.
The first software in which I looked into creating Project-O on was "Humhub", which I discovered with the recommmendation from lecturers. Humhub is a open-source social network software builder, with most of the front end and backend work completed for you, with plugins being able to be downloaded to enable modding of this network.
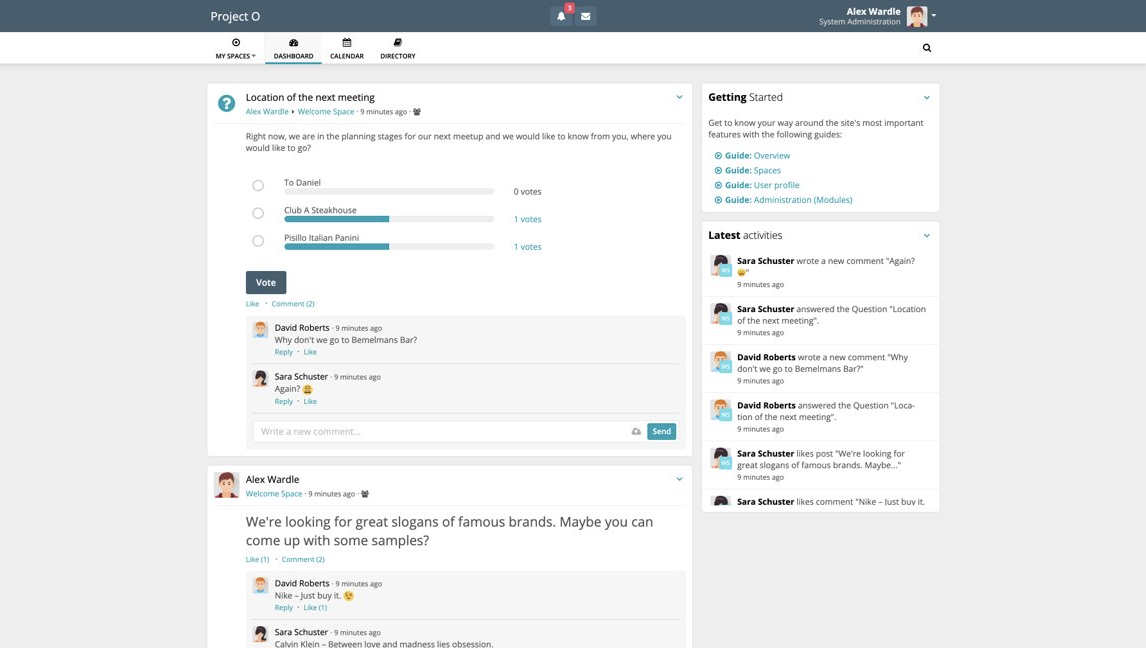
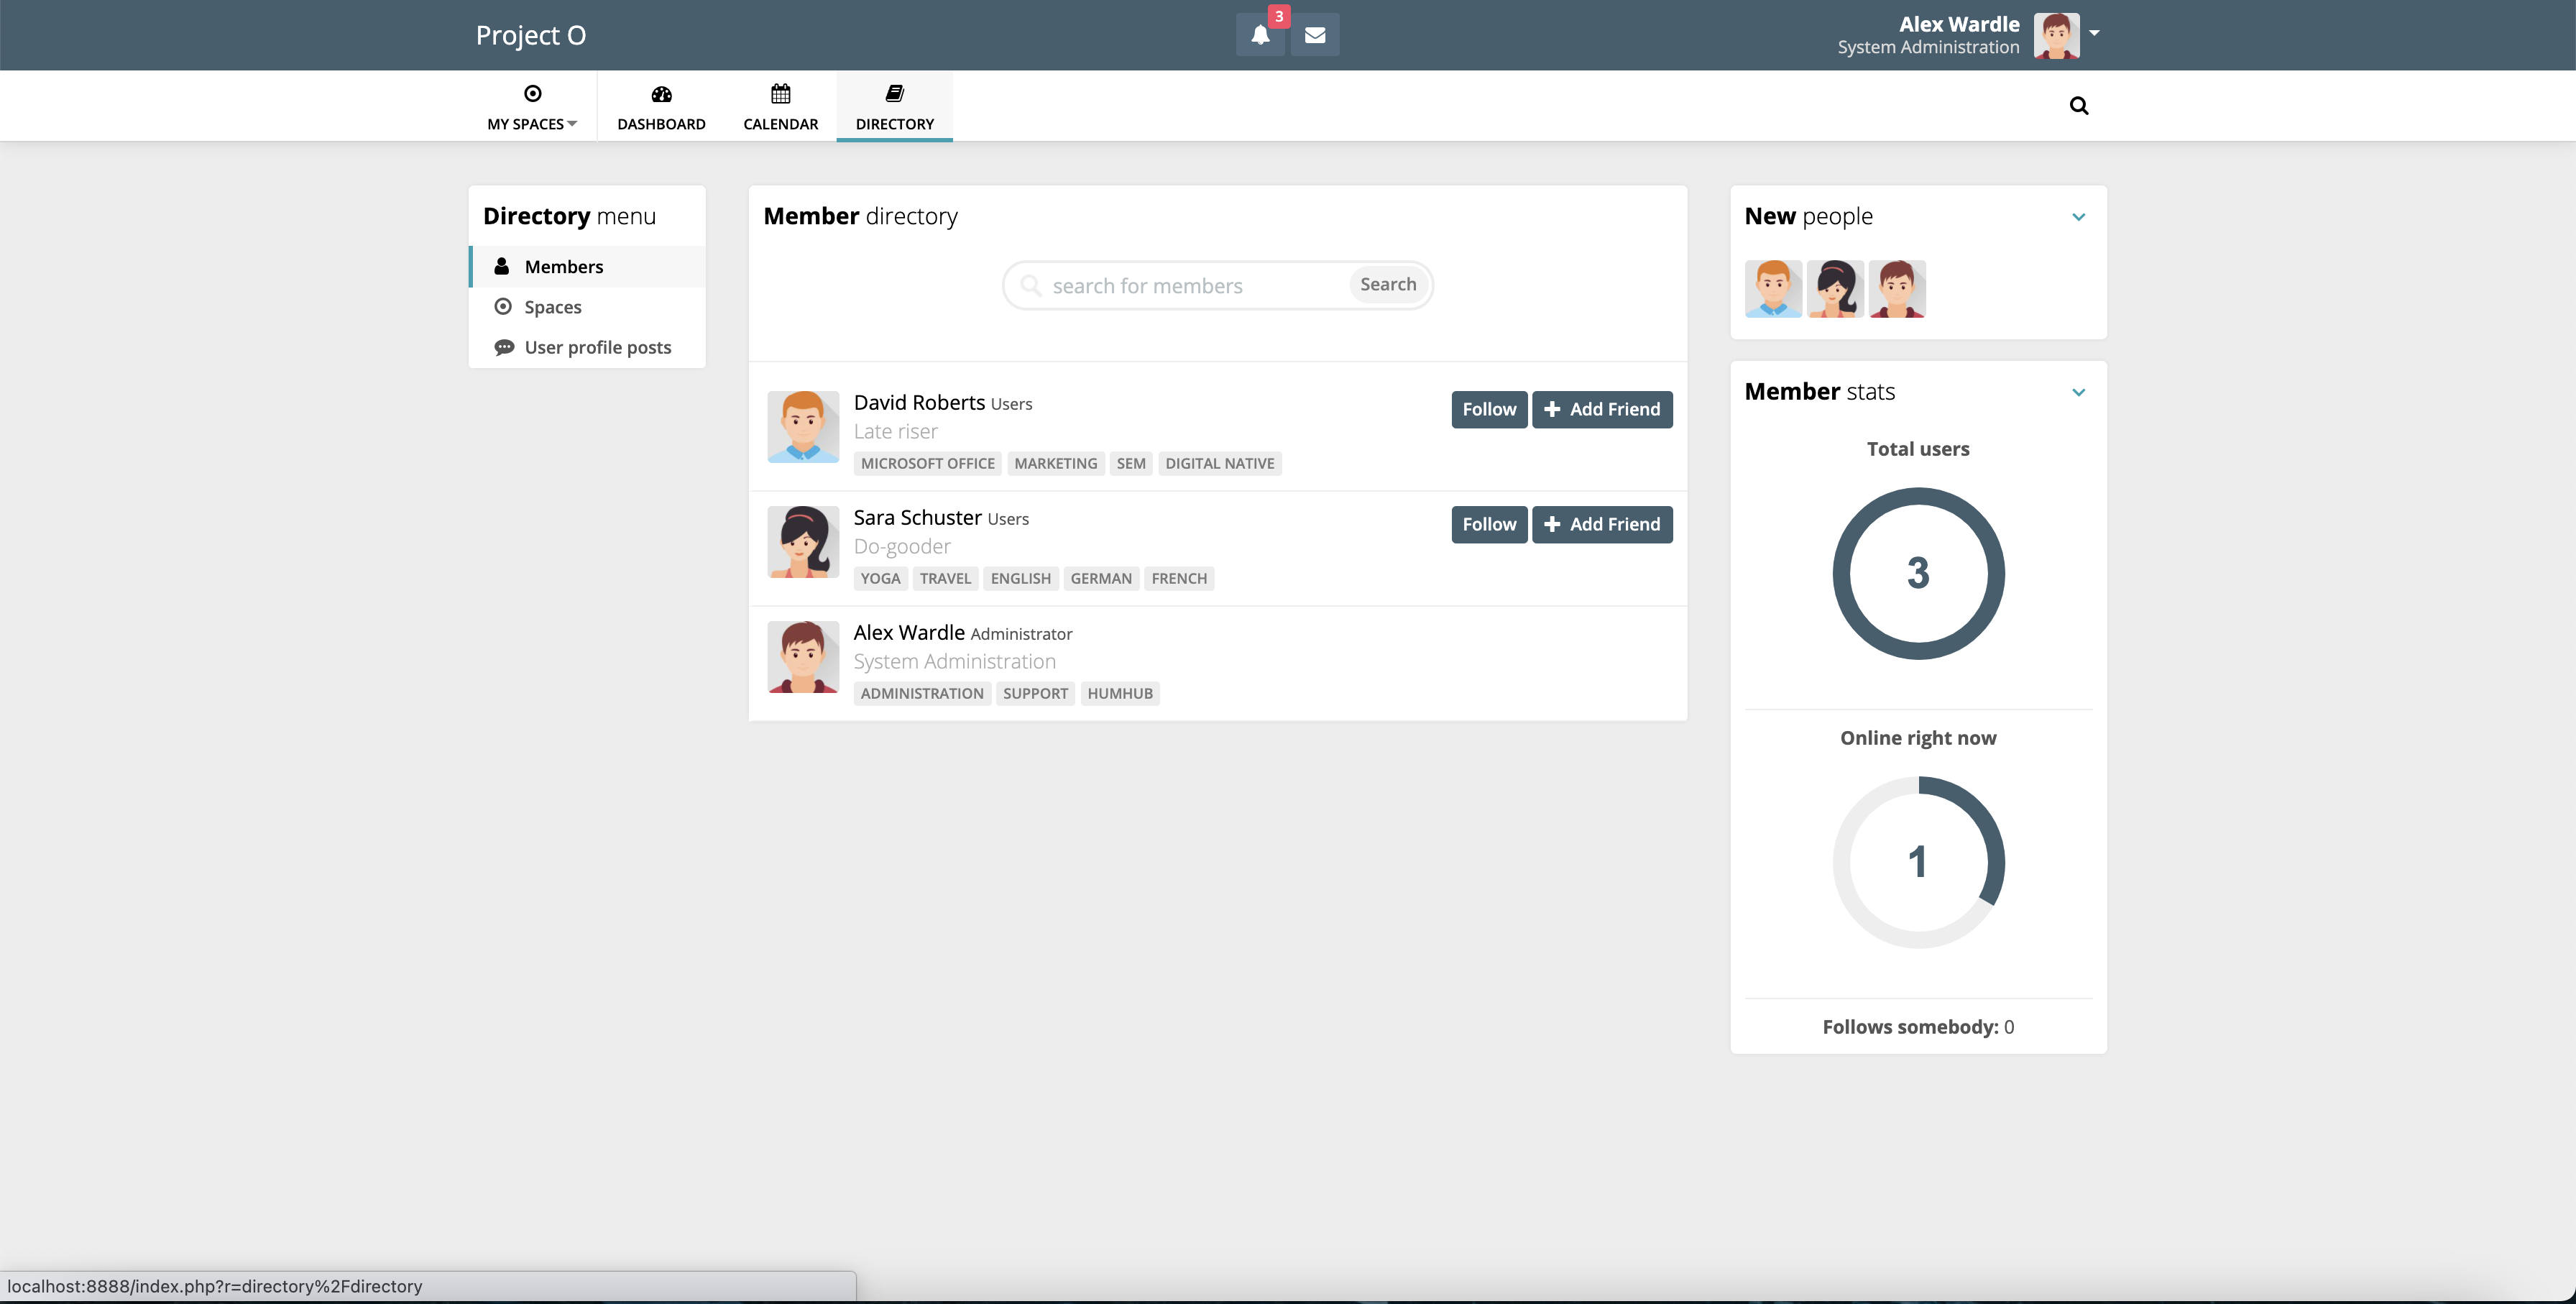
As seen above, here is the working Humhub software, when downloaded and connected to a local host, via Mamp and PHP my Admin database.
Homebrew: Allows Short code downloads, also a package manager

Git: A distributed version control system designed to handle projects with speed and efficiency.

Composer: A Dependency Manager for PHP (php is a server-side language)

I managed to get Humhub set up relatively quickly and the system did not offer much in terms of how to edit the software for the desingers to change it. It also did not provide enough work for me as a developer to feel that I had done enough developing work to ensure success when this project was marked. Furthurmore we wanted to shift to a system which was closer to what could be considered inudstry standard. However I am glad we had experimented
-Due to design restraints as well as time pressure we decided to make the difficult decision to move to Wordpress, and use its many features as a complex PHP framework.
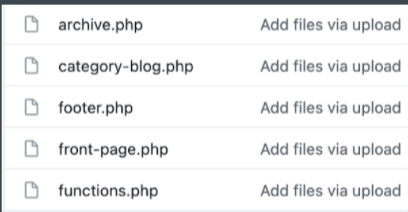
Progress In weeks 7-8: - I downloaded a few Plugins ie Buddypress, Classic Framework Editor. - I created essential files such as functions.php, archive.php, etc

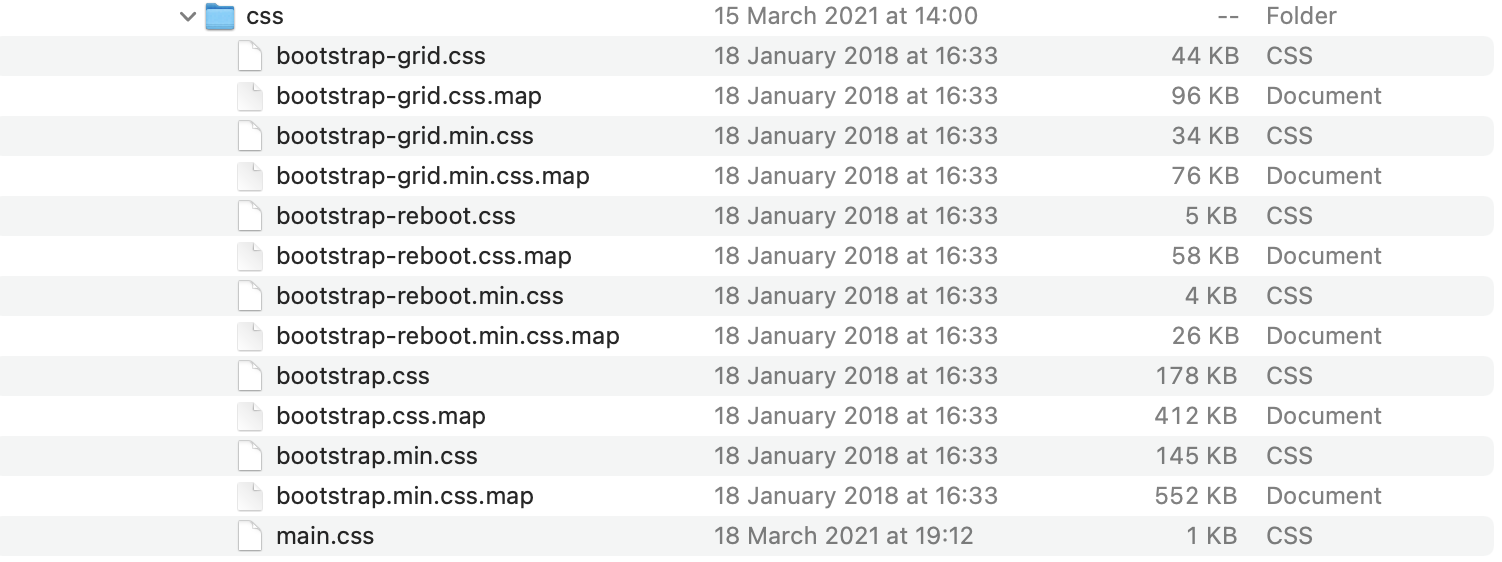
I decided to enque both Bootstrap 4 and Jquery as both frameworks:
Using Bootstrap enables:
-Fewer Cross browser bugs.
-It is a framework which comes up with predefined terms, thus giving you the ability to use code instead of having to create the codes from scratch.

Below is the CSS file in which I imported the Bootstrap 4 CSS files into.
Below is the Js file in which I imported the JQuery and Bootstrap files into.

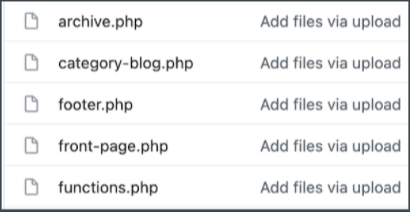
-The creation of a good responsive menu system is essential to users experience. Tp enable this, I had to create an archive that enables the user to search for content they want. Users are also able to post their own blogs and talk to each other within the webapp, via the buddypress plugin, as well as the ability to add thier own pages through blogs.
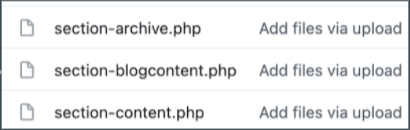
Above is the section in the files enabling blog archives. All files showcased within this project explanation are availbale to view on the Github link below.
Click me
I enabled the group chat function within the buddypress plugin, enabling private messaging, as well as customisable pages.
I also worked on the serach function, enabling users to look up information on blogs/ posts from their lecturers and peers.
I downloaded the plugin classic framework editor which enables the WordPress classic editor and the old-style Edit Post screen. Meaning me and my dev team could edit the Pages CSS live, similar to React.
This enabled myself and my development to team to jump onto a call with our designers to enable them to implement their designs onto the system, using the screen share feature on Microsoft Teams.
In Week 10, our group had a meeting with lecturers and the client to discuss the progress of the project. Disaster would be a understatement for how this project went. The website was deemed to look like that of a website from the early 2000's and it was suggested the development team were relying way to much on the buddypress plugin for functionality.
Issues with the buddypress plugin did not stop at the front end either, the other dev also had issues with the sign up system, with the back end of buddypress not being able to send a sign up email to users signing up to the system.
Evidently the teams confidence dipped after this project with 1 our of the 4 designers staying with the project, luckily the other developer styaed aswell. Due to three quarters of the design team going "missing" design for the projects future was more diffucult. Me and the remanider of the team go together to discuss the main issues with the current system, and three main points arised.
1. The CSS of Buddypress social features could not be changed, and our client hated how they looked.
2. Buddypress had already done a lot of the work, leaving the development team little work to actaully do.
3. WordPress is becoming an outdated system, and I was keen to use a system which was industry standard.
In the aftermath of the client/lecturer meeting, I had a meeting with the design and development team. I made the decision to switch up the software we would use to a React Application. The reason for the change came down to three main issues in which we had discovered from our experimentation of the lst two softwares. As we were building our own app from scratch, there was no prebuilt features in which we would use to help to app function, this enabled us to control exactly how each part of the webapps fucntionality looked, felt and operated. Furthurmore it enabled the development team much more work to do, so content for the portfolio was not a worry. React.js is also one of the fastest growing JavaScript frameworks in the world, and after speaking to potential work experience compaines, it became apprent that experince with either React.js or Vue.js was essential.
Due to the lack of designers now working on the project I decided to create a Instagram clone and would then adapt it to the clients needs, hence the instagram place holder images for the logo and instagram colour pallette
The main feed for the site needed to have a communal feel, which enables students to share ideas, as the client wanted. In order for this to work properly this would need a competant API, which can pull and implement information and files between the back end of Firebase and the React Application. Creating this link was the most difficult part of the process and required the most iterations. 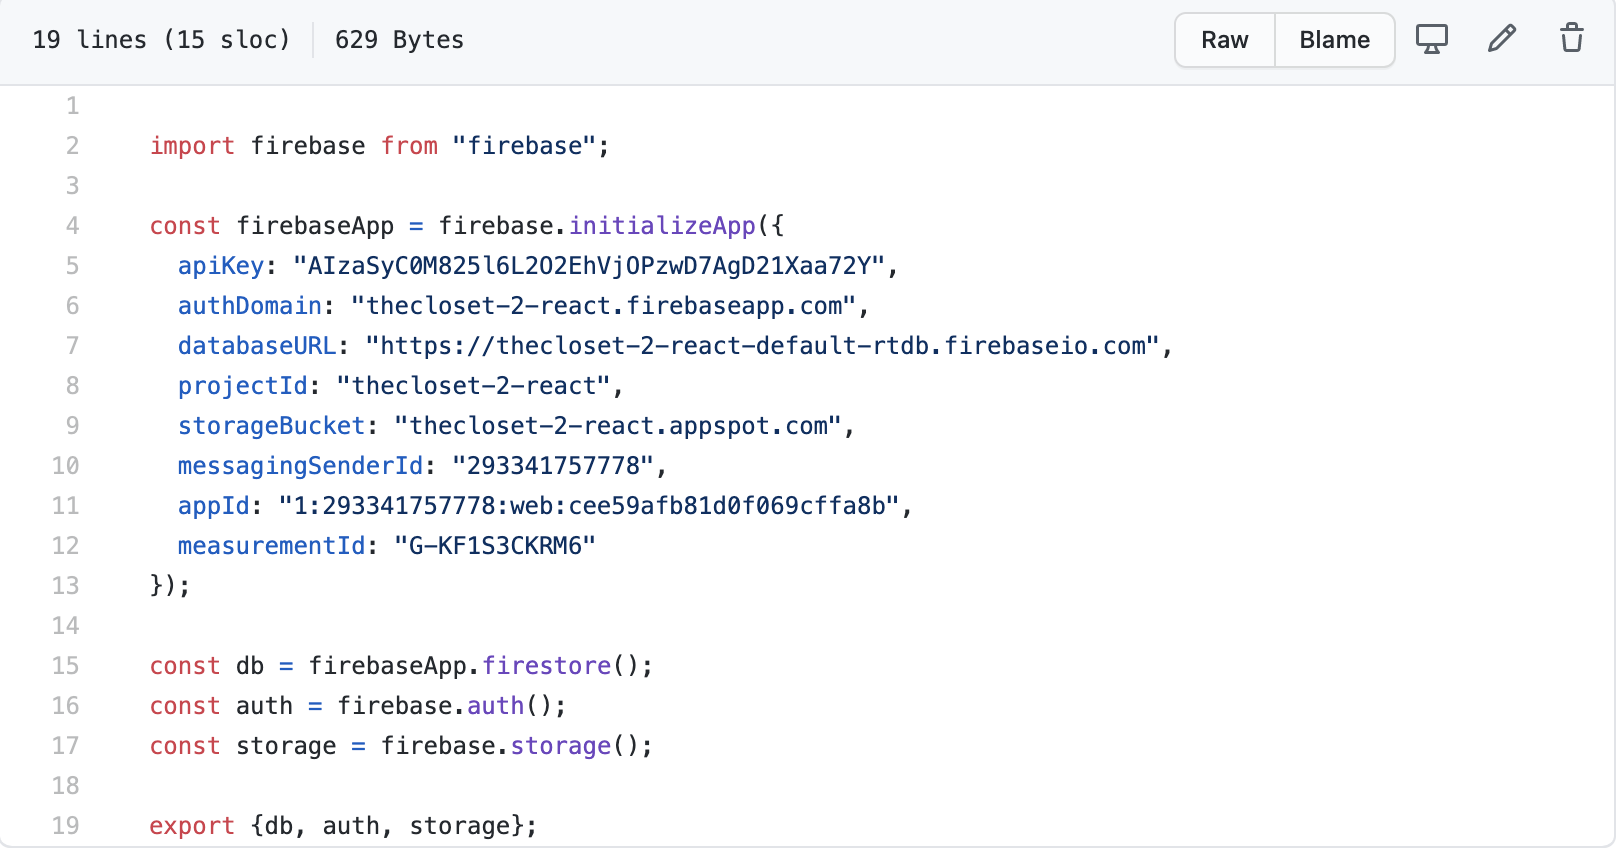
As seen above, the code for firebase.js, linking Firebase hosting to the application
FunctionalityTo begin with I created the basic functionality within App.js establishing an input field within App.js, enabling username and caption placeholders and the top navbar to be seen. I then added the firebase hosting component, the use of firebase saved a lot of time, when looking at back end work, in which enabled me to make use of the many benifits of the service, such as Firebase authentication, enabling students to sign in using their emails, and even university emails should we enable the use of microsoft login furthur down the line.
After I had established firebase hosting for the application, I got to work on adding the ability to send a message (which would then become the ability to post furthur into the project). To do this I created Post.js and Post.css, which would handle everything to do with user created posts and how they look/function. I had a few small issues trying to straighen out posts with certain images not being communicated to the firebase server however I managed to straighten out these issues as they were predominantly grammatical error due to me being a newbie to the wonders of React.js
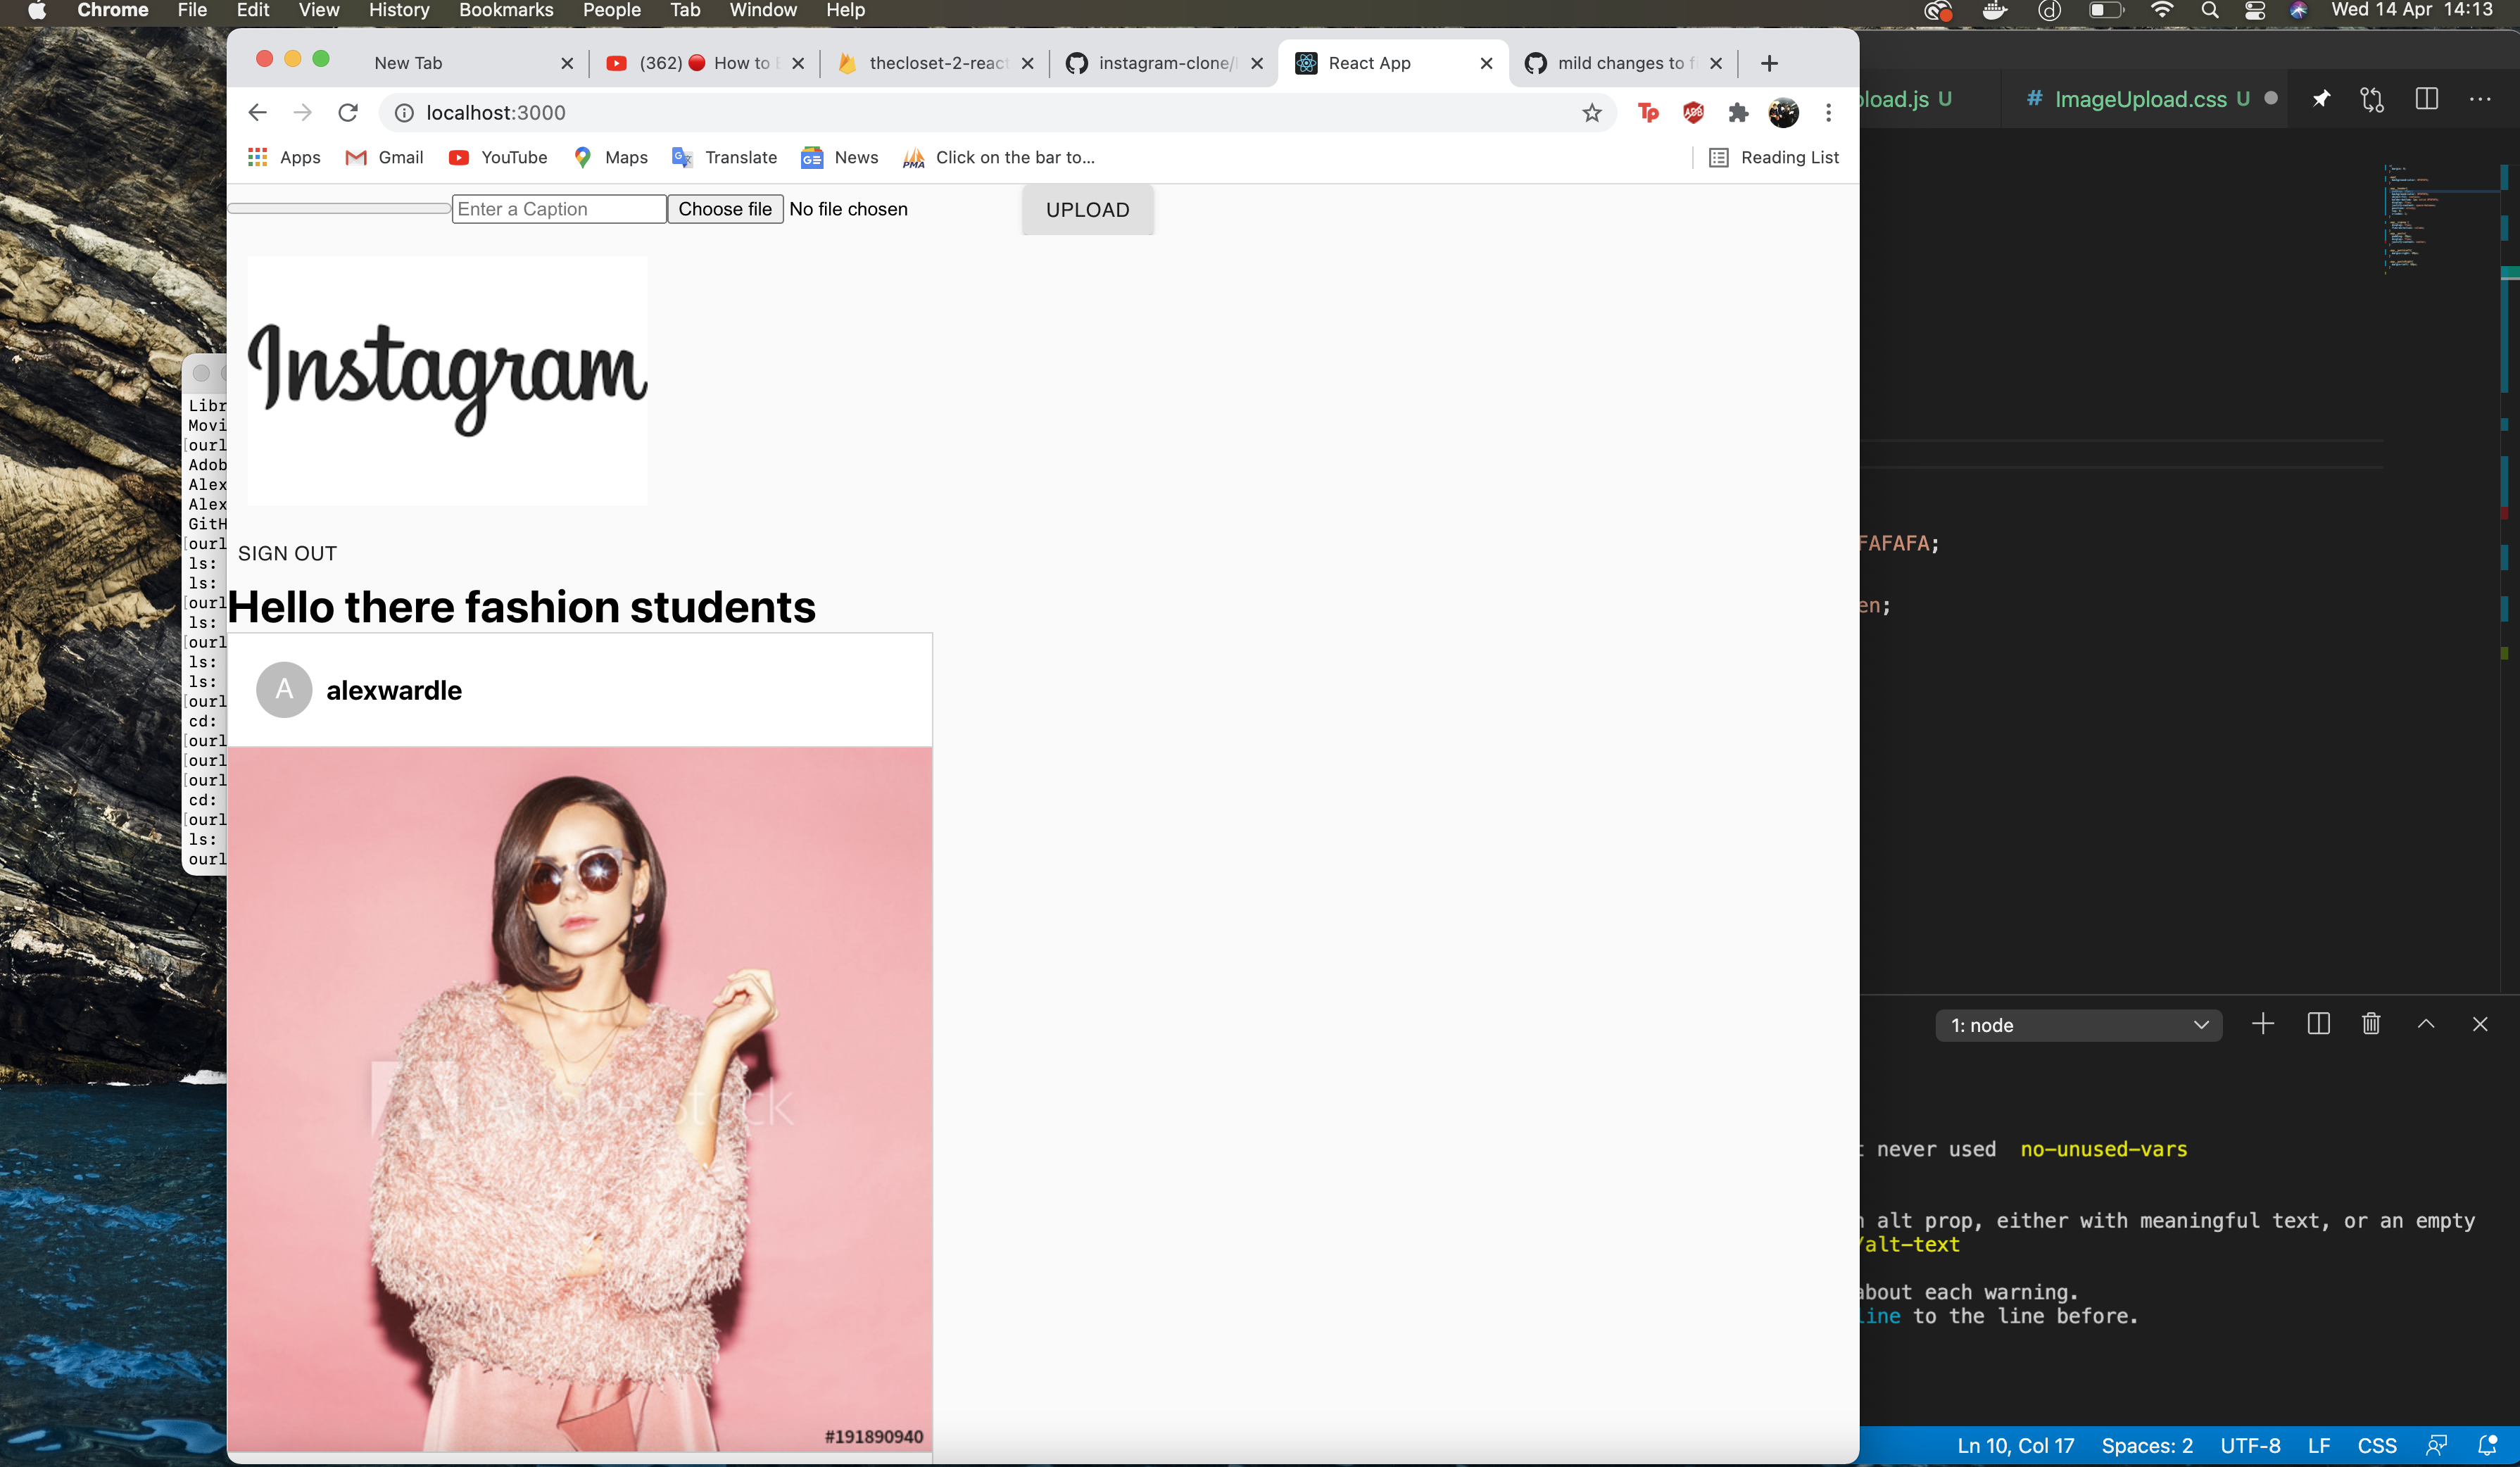
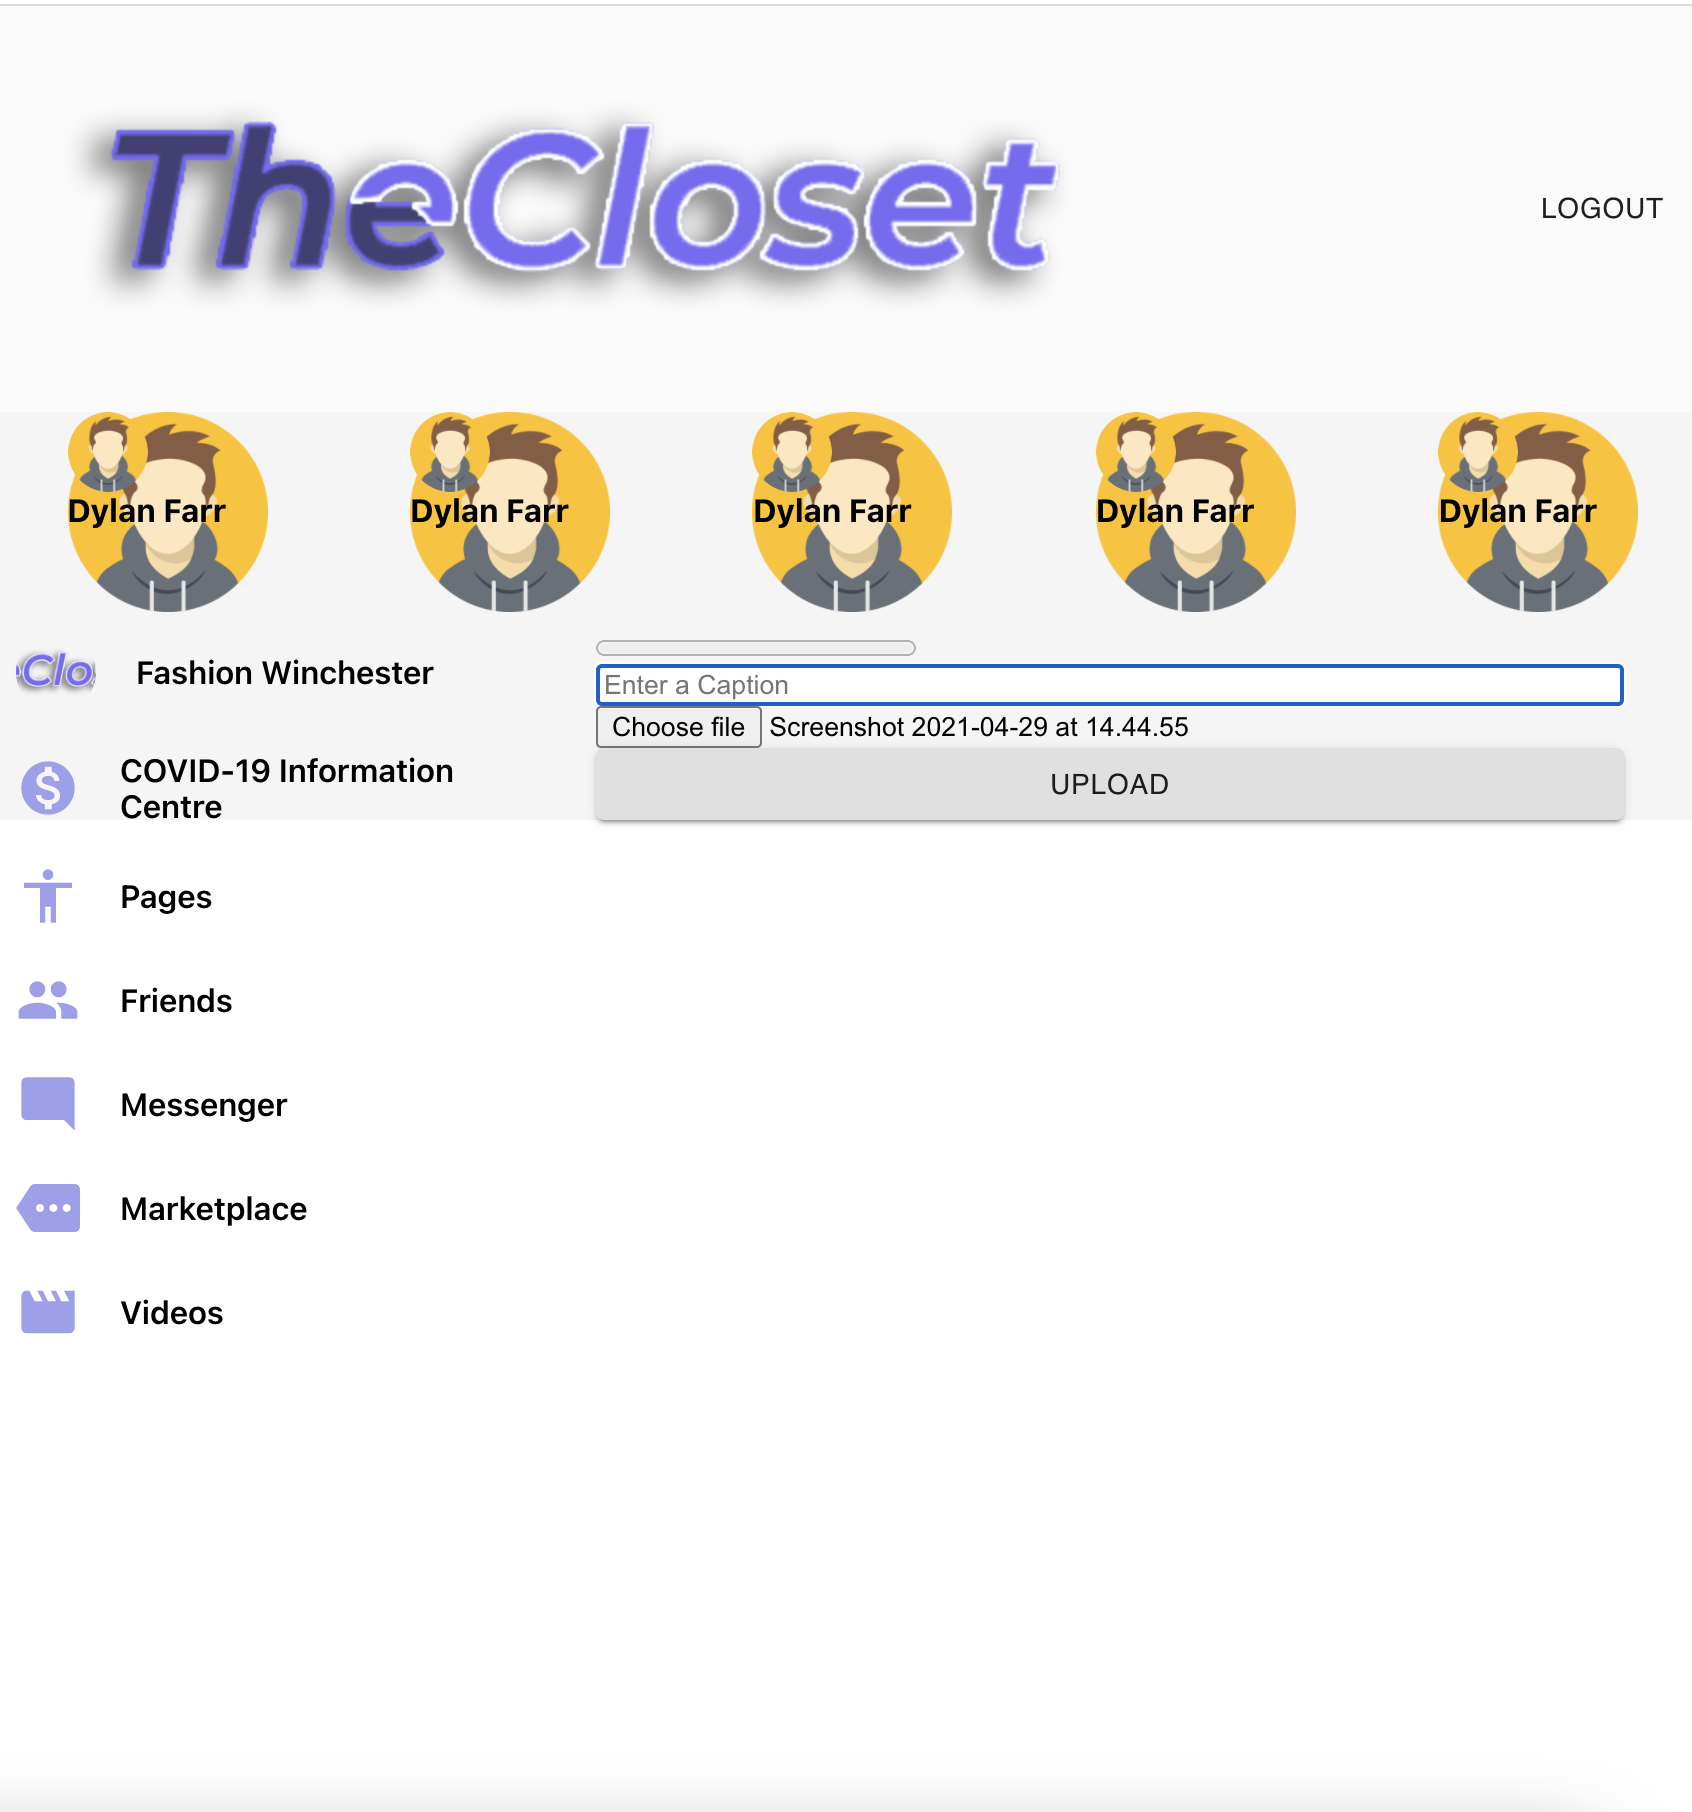
The image incuded shows a basic look into what the feed looks like at this stage, with the code for it being shown beneath it.
I then downloaded Material Ui through the terminal into the project. Material-UI contains react components such as icons and themes, which enable faster and easier web developement. I then imported this component into App.js and made user of the Avatar icon to add placeholder for accounts created. I then handed over to the other developer to handle some CSS styling of the webapp so it was more user friendly, before I implemented the feature which enabled Usernames, Images and Comments to be customisable. This was also done inside the Post function section within Post.js.
After doing that I then implemented a function which tells the app to render posts, creating a loop in chronological order, with each component showing a username at the top, image in the middle and comments sections at the bottom (not yet developed).

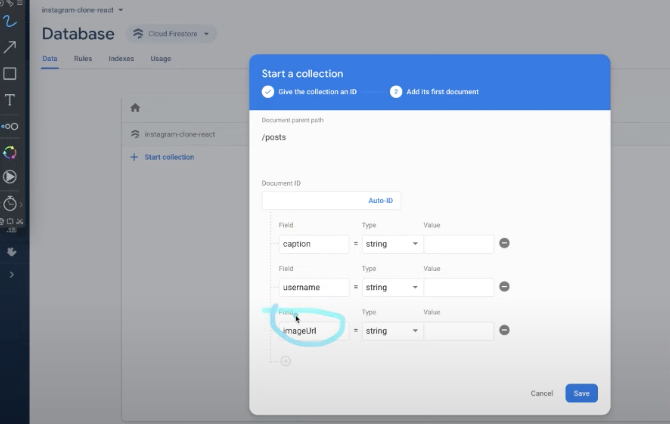
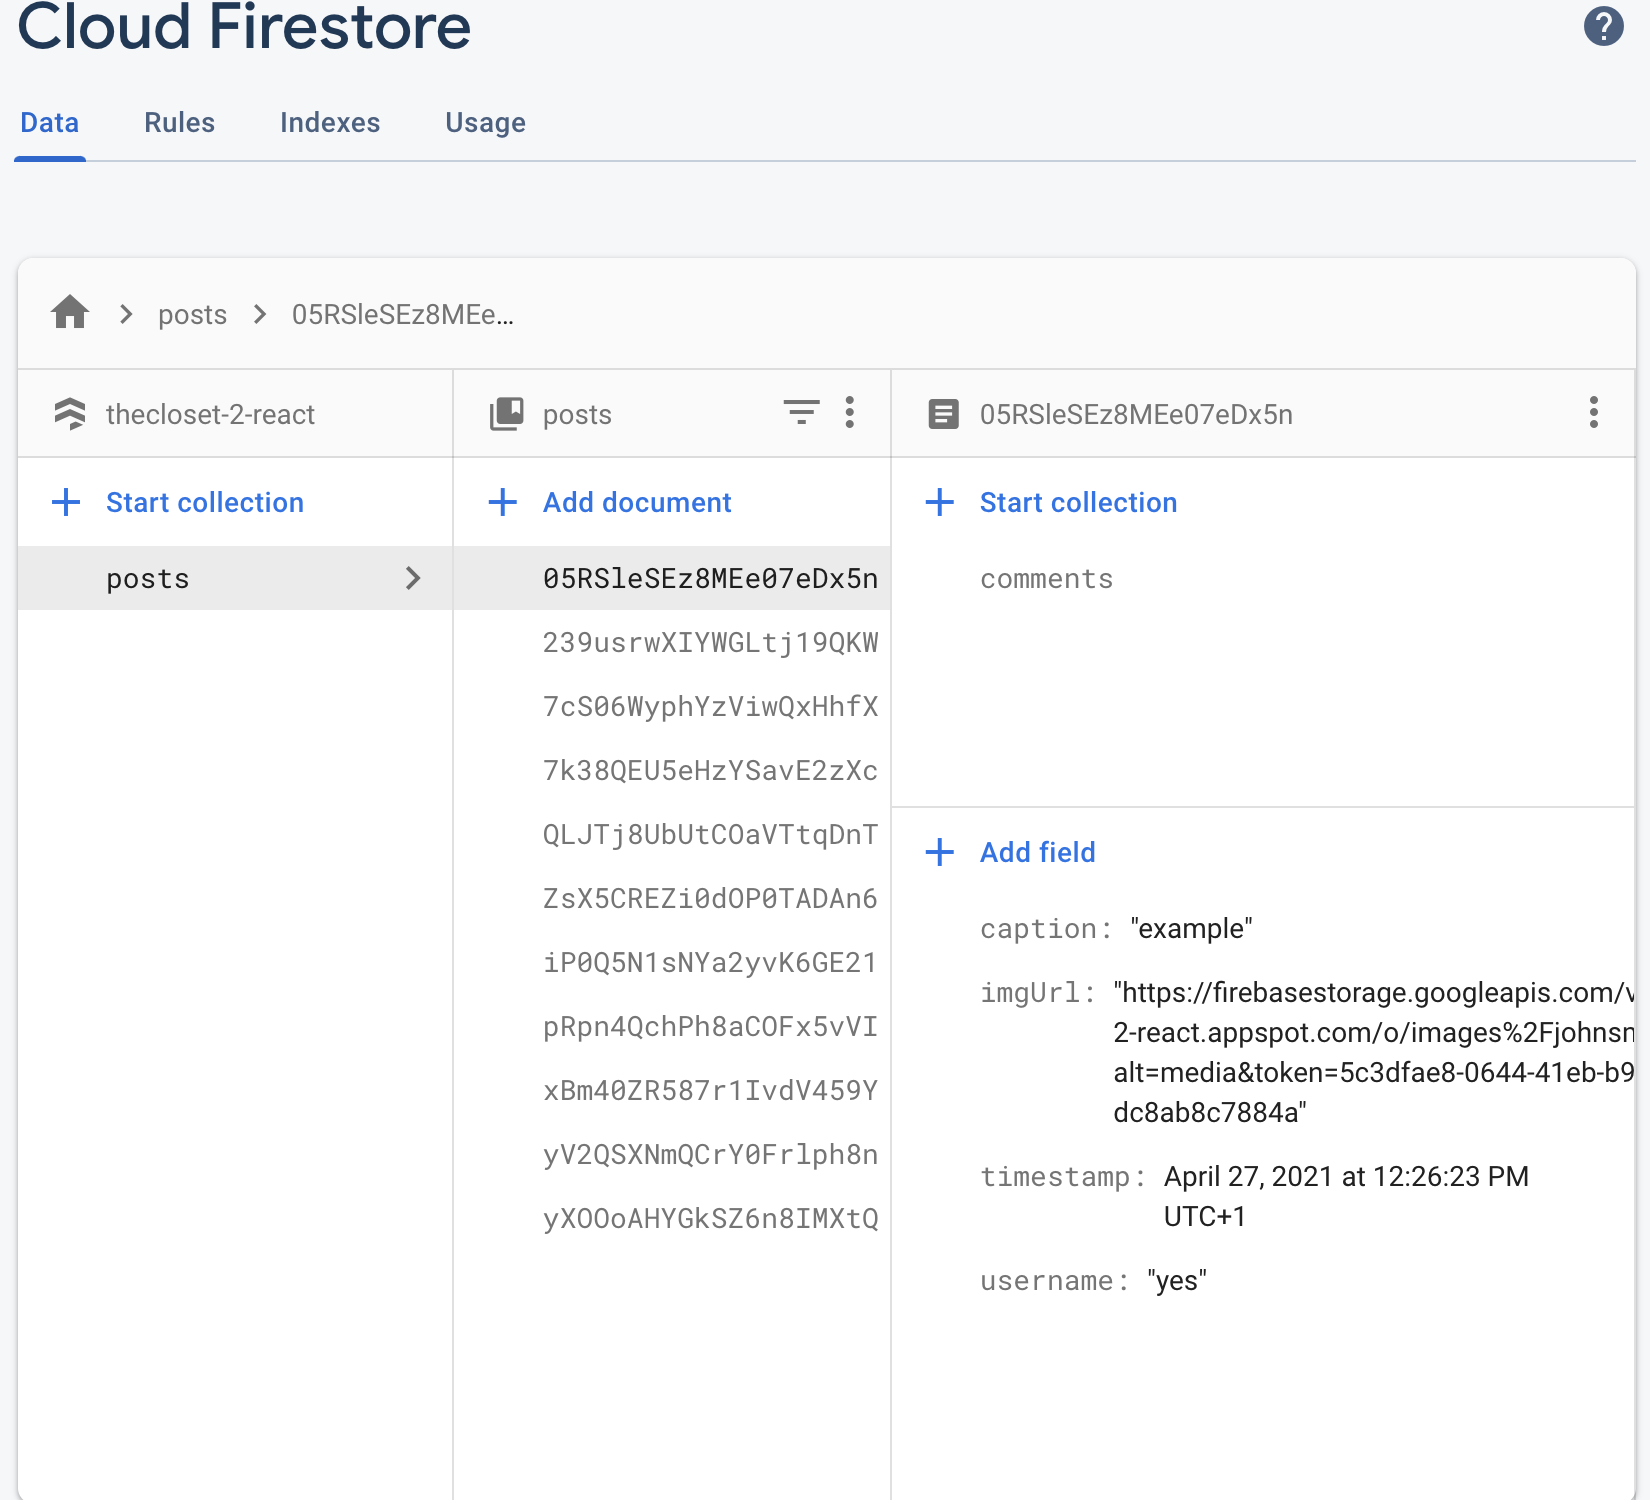
The next step I implemented was to add a firebase database, on firebase. I established it within test mode whilst the project was being developed. Firebase is a hybird between SQL and Node SQl databases. Its a middleground which has a document collection structure. I established a collection of posts, with each post containing multiple documents (field) inside it, ie Caption, Username and ImageURL. Each Post with its documents, make up a single post component within the app.
I then added a configuration file to the application, this file was responsbile for all my config settings. It also contains an API key enabling communcation between the user and the database. This process initailises the app. To enable this I had to porcess the command "npm i firebase" into the terminal, installing Firebase modules into the project.
After this was done, I needed to sort out access to the database, to do this I made use of three of Firebases services
Next, I set up the useEffect to push and pull data from the database, I did this through the code on app.js. useEffect is a command that runs code on a conition, allowing users to upload and comment on posts.

After this was completed I set up User Authentication, I made use of one of Firebases services which enabled a plethora of different login methods, I decided to go with email authentication, as it was the most appropriate for students looking to sign up.
The code for this is was all performed within app.js
  useEffect(() => {
    const unsubscribe= auth.onAuthStateChanged((authUser) => {
      if(authUser){
        console.log(authUser);
        setUser(authUser);
        if(authUser.displayName){

        }else{
          return authUser.updateProfile({
            displayName: username,
          });
        }
      }else{
        setUser(null);
      }
    })
    return () => {
      unsubscribe();
    }
  },[user , username]);
   useEffect(() => {
    db.collection('posts').orderBy('timestamp','desc').onSnapshot((snapshot) => {
      setPosts(
        snapshot.docs.map(doc=>({
          id: doc.id,
          post : doc.data()
        })
      ));
    })
  }, []);

  const signUp = (event) => {
    event.preventDefault();
    auth.createUserWithEmailAndPassword(email , password)
    .then((authUser) => {
      return authUser.user.updateProfile({
        displayName: username
      })
    })
    .catch((error) => alert(error.message));
    setOpen(false);
  }

  const signIn = (event) => {
    event.preventDefault();
    auth.signInWithEmailAndPassword(email , password)

    .catch((error) => alert(error.message));
    setOpenSignIn(false);
  }
After this I worked on Storing Posts and Images to Firebase. Doing this was very intricut. I created a component called ImgUpload. I created another input field which captions enabled, a file picker and a post button. I created the files ImgUpload.js and ImgUpload.css which controlled these features.
  import React , { useState } from 'react';
import {Button} from '@material-ui/core';
import {db , storage} from './firebase.js';
import firebase from 'firebase';
import './ImageUpload.css';

function ImgUpload({username}) {
    const [caption , setCaption] = useState('');
    const [image, setImage] = useState(null);
    //const [url, setUrl] = useState(" ");
    const [progress,setProgress] = useState(0);

    const handleChange = (e) =>{
        if(e.target.files[0]){
            setImage(e.target.files[0]);
        }
    }

    const handleUpload = () =>{
        const uploadTask = storage.ref(`images/${image.name}`).put(image);
        uploadTask.on(
            "state_changed",
            (snapshot) => {
                const progress = Math.round(
                    (snapshot.bytesTransferred / snapshot.totalBytes) * 100
                );
                setProgress(progress);
            },
            (error) =>{
                console.log(error);
                alert(error.message);
            },
            () => {
                storage
                .ref("images")
                .child(image.name)
                .getDownloadURL()
                .then(url => {
                    db.collection("posts").add({
                        timestamp : firebase.firestore.FieldValue.serverTimestamp(),
                        caption : caption,
                        imgUrl : url,
                        username : username
                    });

                    setProgress(0);
                    setCaption('');
                    setImage(null);
                });
            }
        )
    }
    return (
        div className="imageupload">
            progress className= 'imageUpload__progress' value ={progress} max="100" />
            input type = "text" placeholder = "Enter a Caption" onChange={event => setCaption(event.target.value)} />
            input type = "file" onChange = {handleChange} />
            Button onClick={handleUpload} variant='contained' color='secondry' >
                Upload
            /Button>
        /div>
    )
}

export default ImgUpload
After this I tried to install a plugin called instagram clone, however due to me using React v18 (lastest version to date) the plugin would not work, as it was suited to version 17 of last year. This plug in was meant to add essentail styling and enable us to include am interactive sidebar linking to the instagram accounts of the user, should they choose in input it.
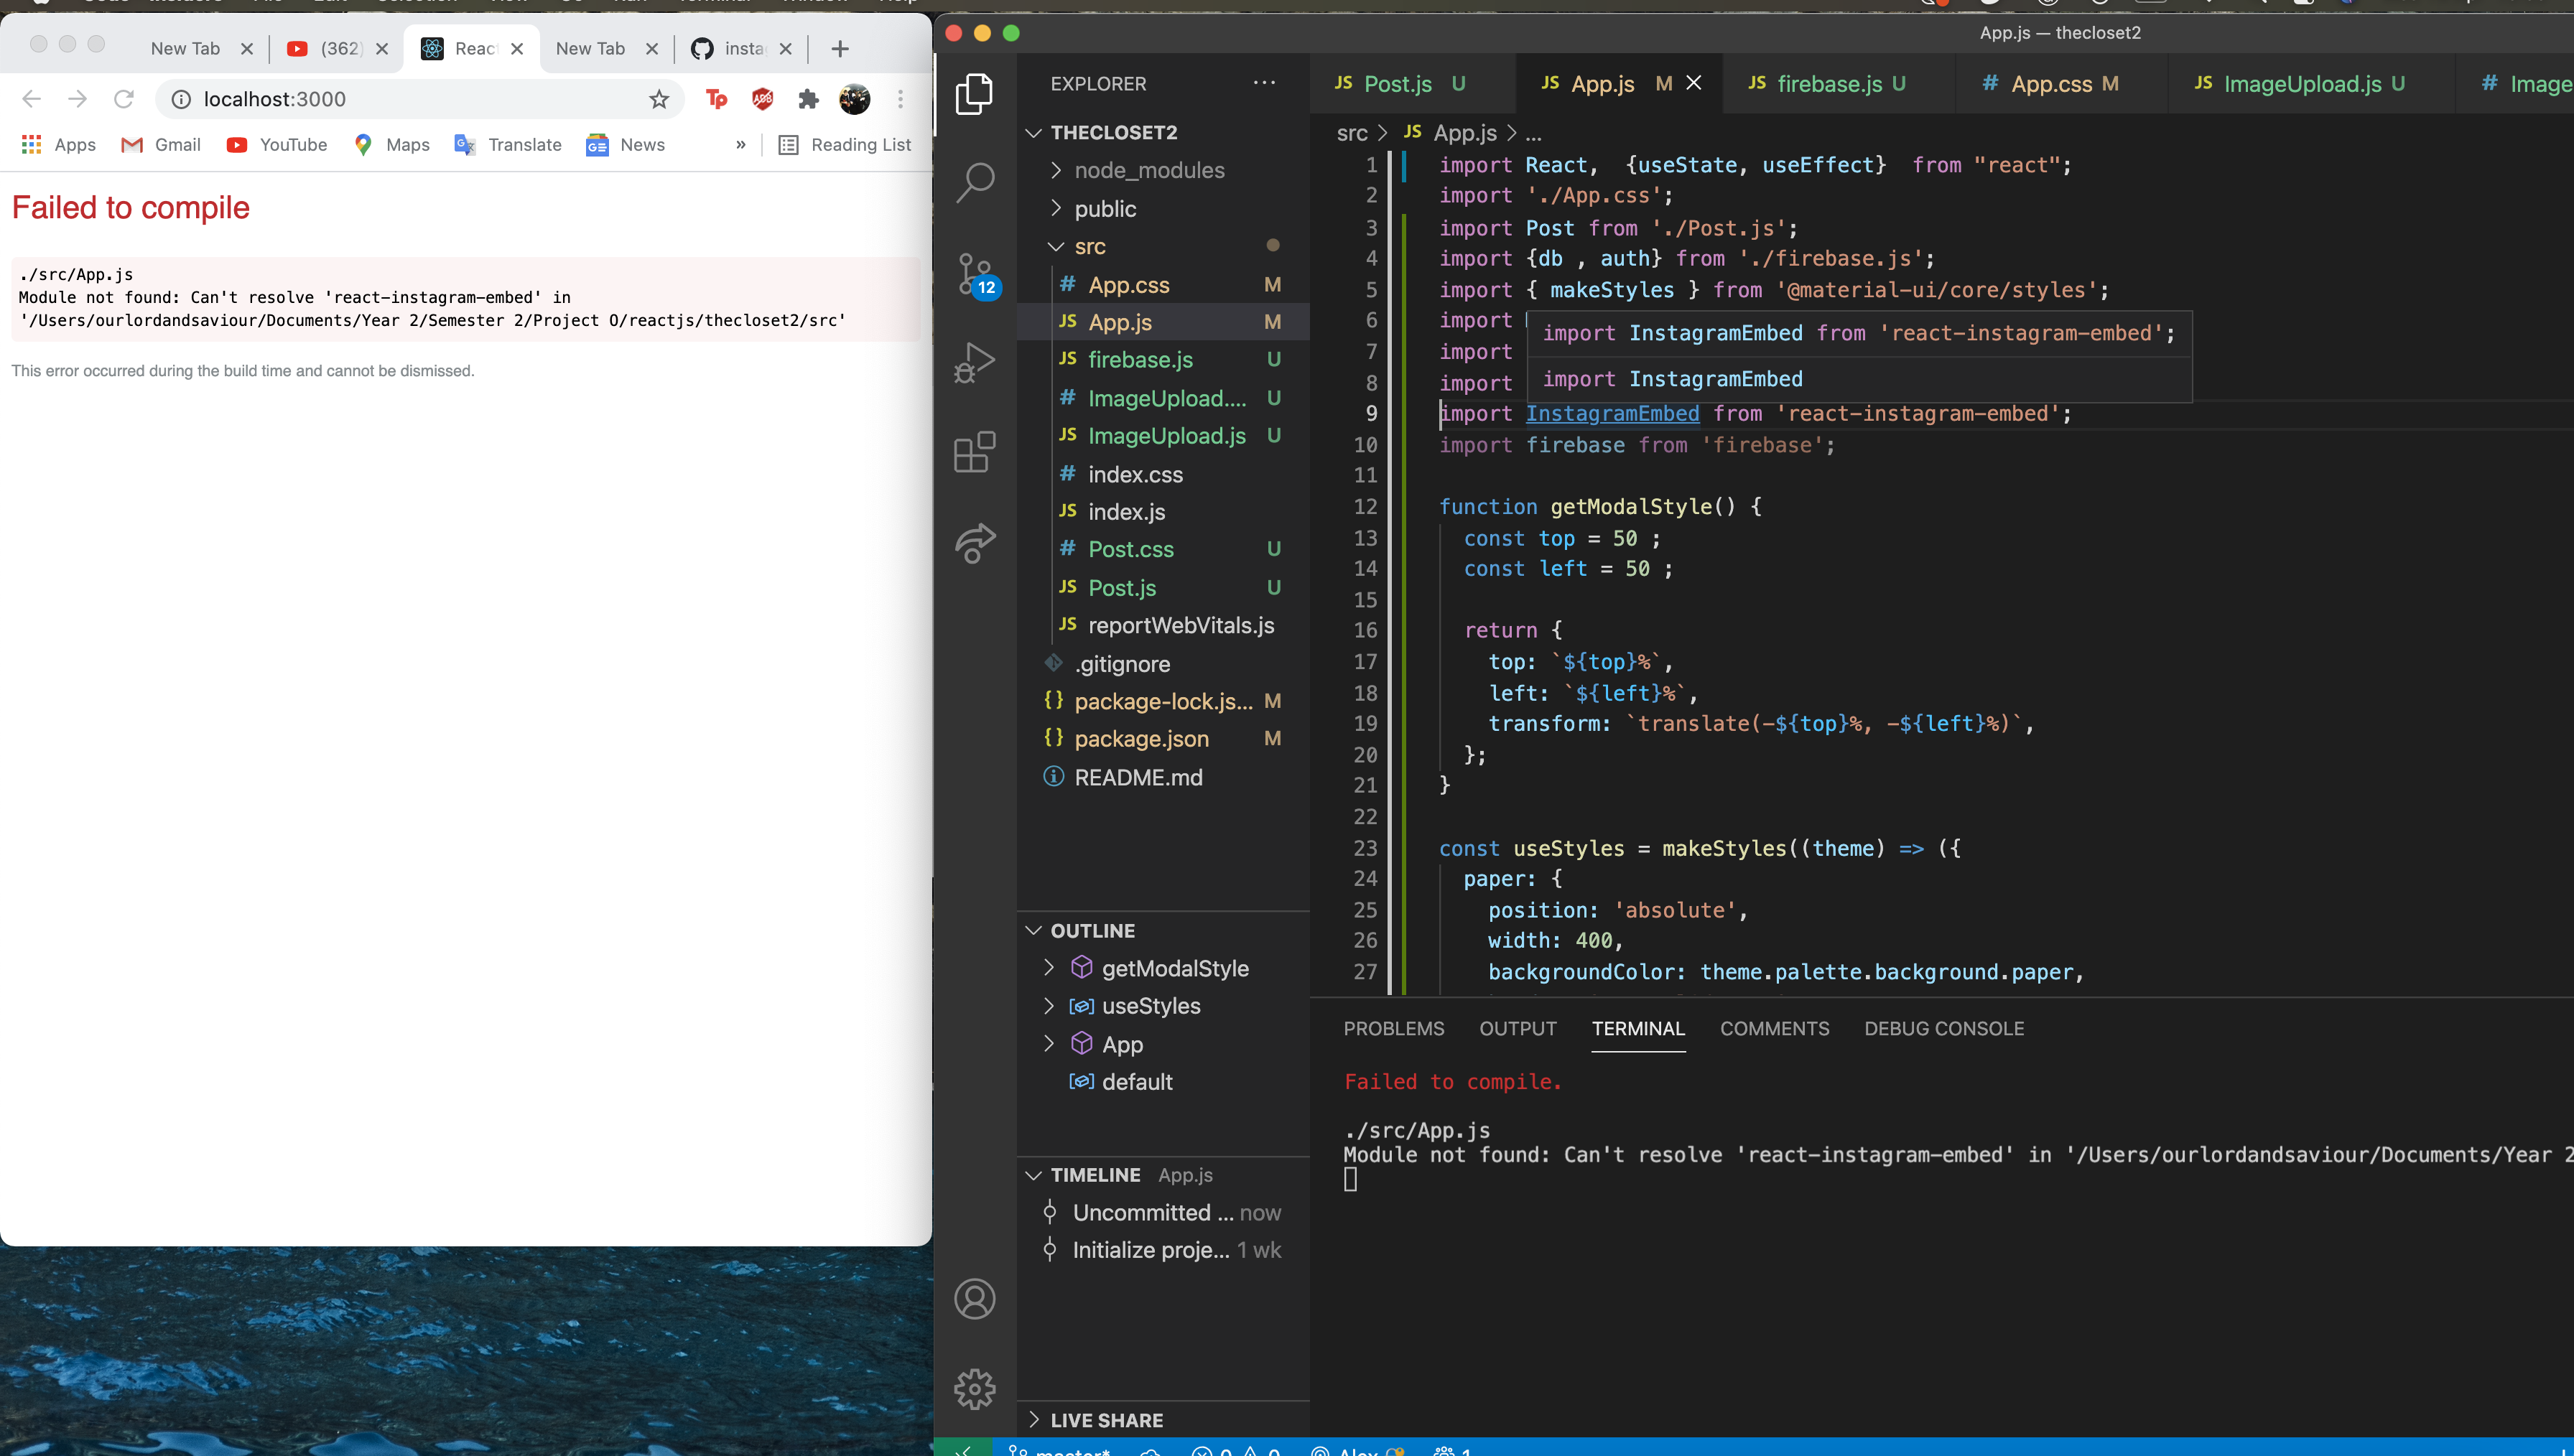
However I went and researched other similar plug ins whcih could provide a similar function and I decided to go with the Facebook version of the plug in, as it provided a similar fucntion, as well as being able to show more interactive content.
I then handed the project over to the other developer, who worked on the commenting functionality, as well as implementing basic CSS.
We then had a meeting with our client, who said they would take over the design work of the project, and asked me to continue working on the project over the summer break. Because of this we felt that the project should stay within local hosting for now, and to be uploaded and hosted on a firebase server when the project was to be released for a beta trail. As seen in the example above, I have already started working a stories feature, which works very similar to that of a story on snapchat or instagram, however this was done in my own time after me and my team had handed in the work we had set out to complete.
To conclude, I feel this entire project has been a big learning process. It has helped to me flourish skills in lots of different areas of programming, as well as my project management skills, especially within the last 6 weeks of the project. I feel this is very evident throughout the many set backs throughout the projects development process. Going through 3 different softwares, as well as learning from lecture and client critque and advice has enabled me to learn and get a taste of what the professional workplace is really like! However after every setback and problem, me and Luke managed to find a successful outcome.
I have really enjoyed working on this project, especially on the React side of it all. I feel this experience has really encourged me to use ingenuity and research to produce a professional outcome,, which has led to me carrying the project furthur with the client within the next few months.